In-App purchases
Automatic verification and sending of purchase information
Starting Appodeal SDK 3.7.0+, it is possible to automatically verify and submit purchases/subscription to Appodeal, as well as receive purchase information from the Appodeal SDK using Appsflyer.
To activate this feature contact us via email at support@appodeal.com or the live chat, and ask to enable ad ROI360 feature.
Before implementing the ROI360 needs to be integrated with AppStoreConnect. To do this, you need to perform the following steps:
Step 1. Set the App Store credentials for ROI360 receipt validation
Obtain the following credentials from App Store Connect and forward this information to our support team.
- In-App Purchase key
- Key ID
- Issuer ID
To set iOS credentials:
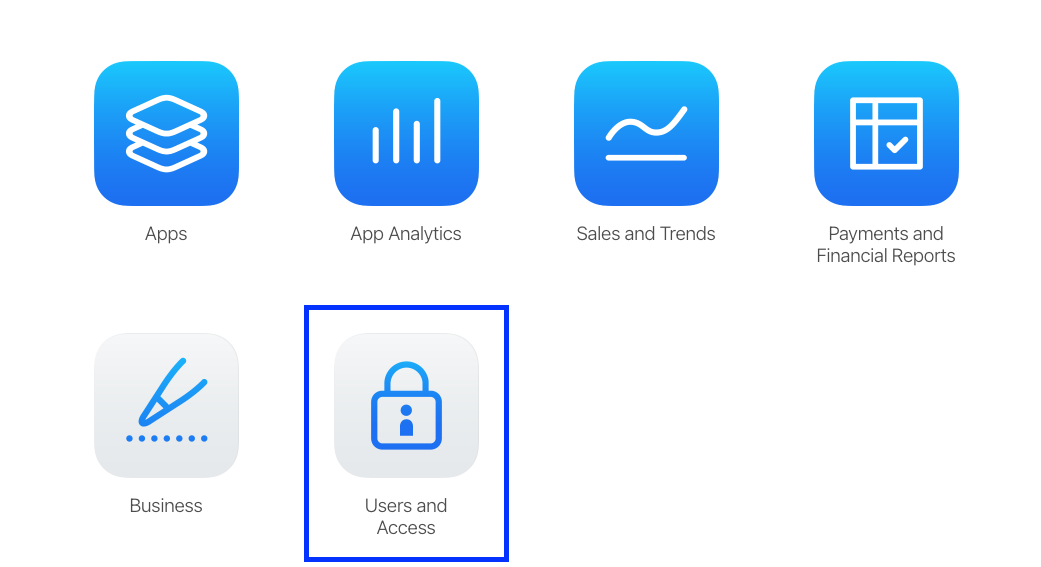
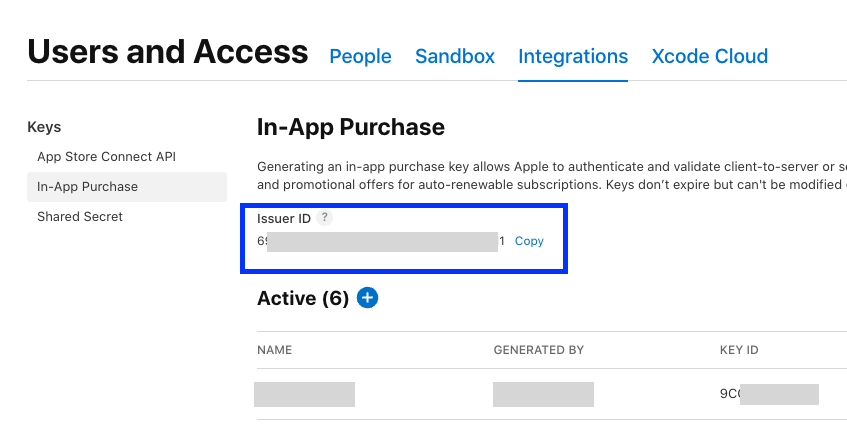
- In the App Store Connect, go to Users and Access
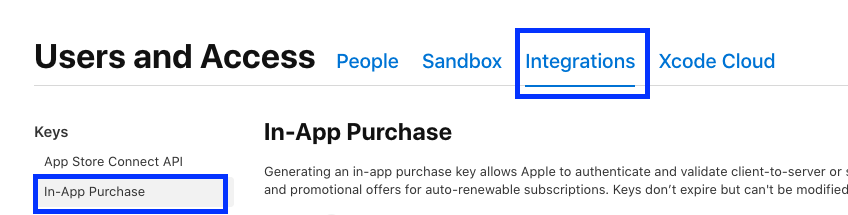
- Go to Users and Access > Integrations, and from the Keys list, select In-App Purchase.
- Click + to generate a new In-App Purchase key.

-
Enter a name for your API key.
-
Click Generate.
-
Click Download In-App Purchase Key next to the key you just generated to download it. Note: You can only download the key once.
-
In App Store Connect, copy the Key ID of the key you just generated and paste it into the AppsFlyer purchases & subscriptions setting for Key ID.
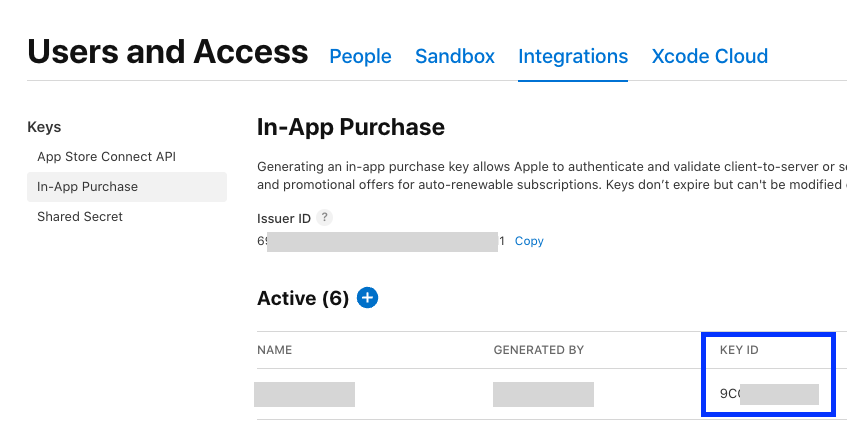
- In App Store Connect, copy the Issuer ID. Note:** If the Issuer ID is not displayed at the top of the page, create an App Store Connect API key (with any access level). After that, the Issuer ID will appear at the top of the page for the In-App Purchase key.
Step 2. Send App Store notifications directly to AppsFlyer
Before continuing, make sure to request the AppsFlyer server notifications endpoint from our support team.
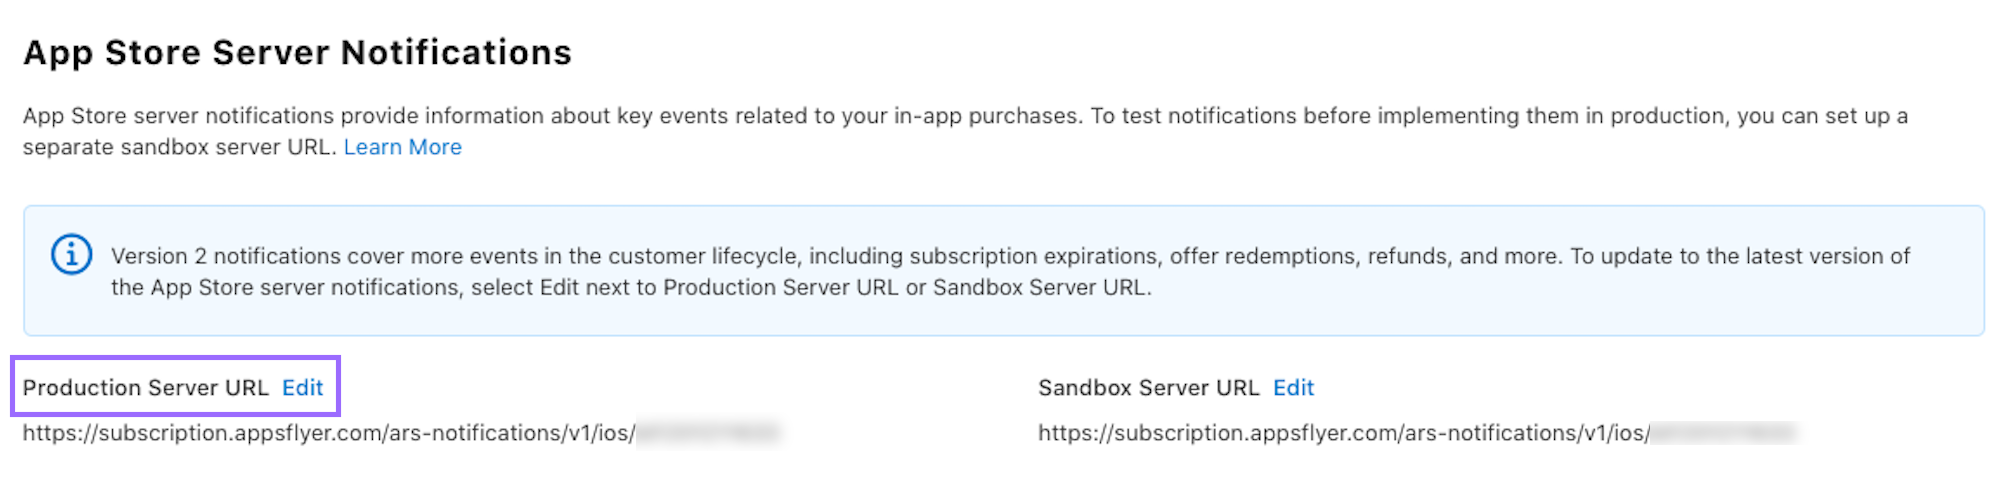
- In App Store Connect, in the App Information section, scroll to App Store Server Notifications, and next to Production Server URL, click Edit.
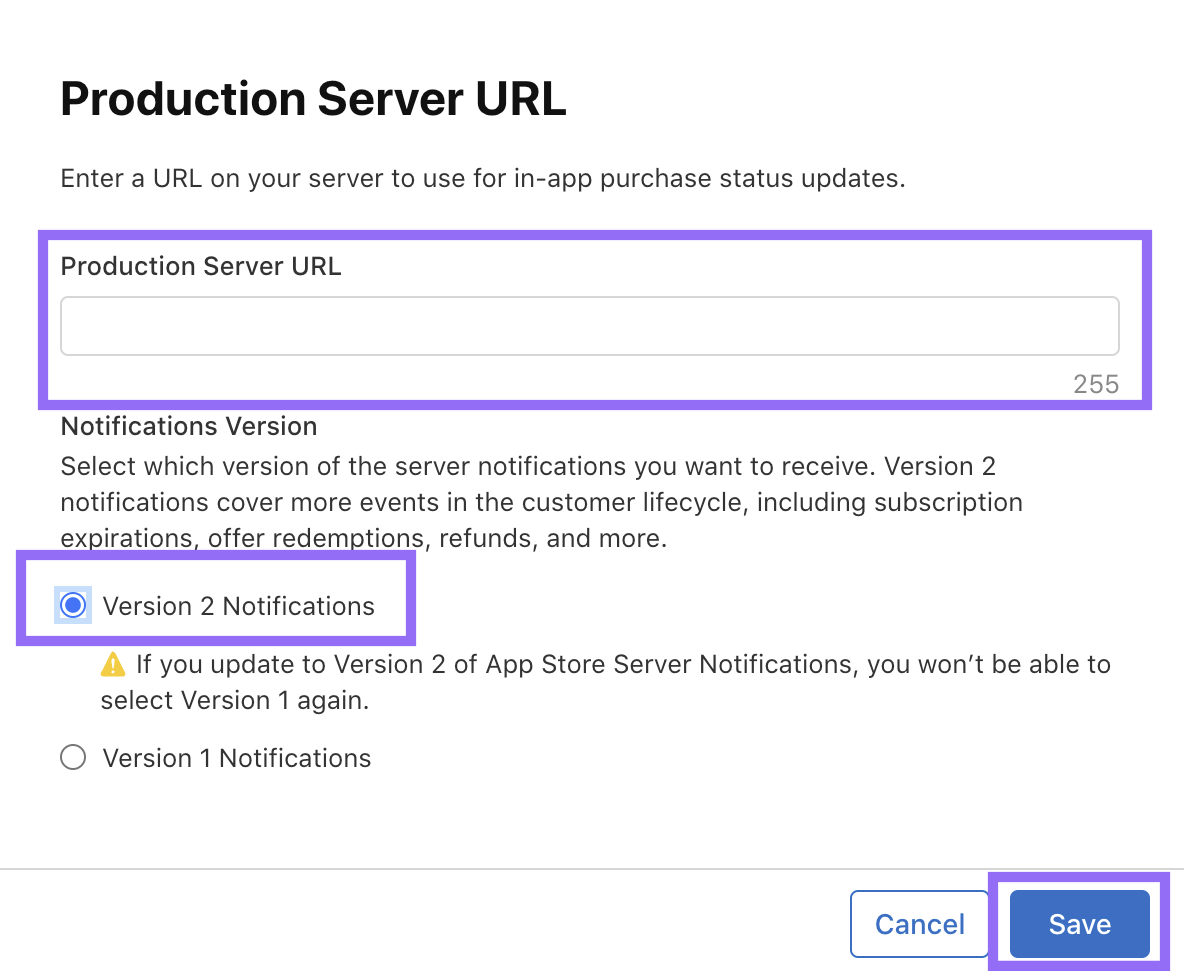
- Paste the URL provided by our support team, select Version 2 Notifications, and click Save.
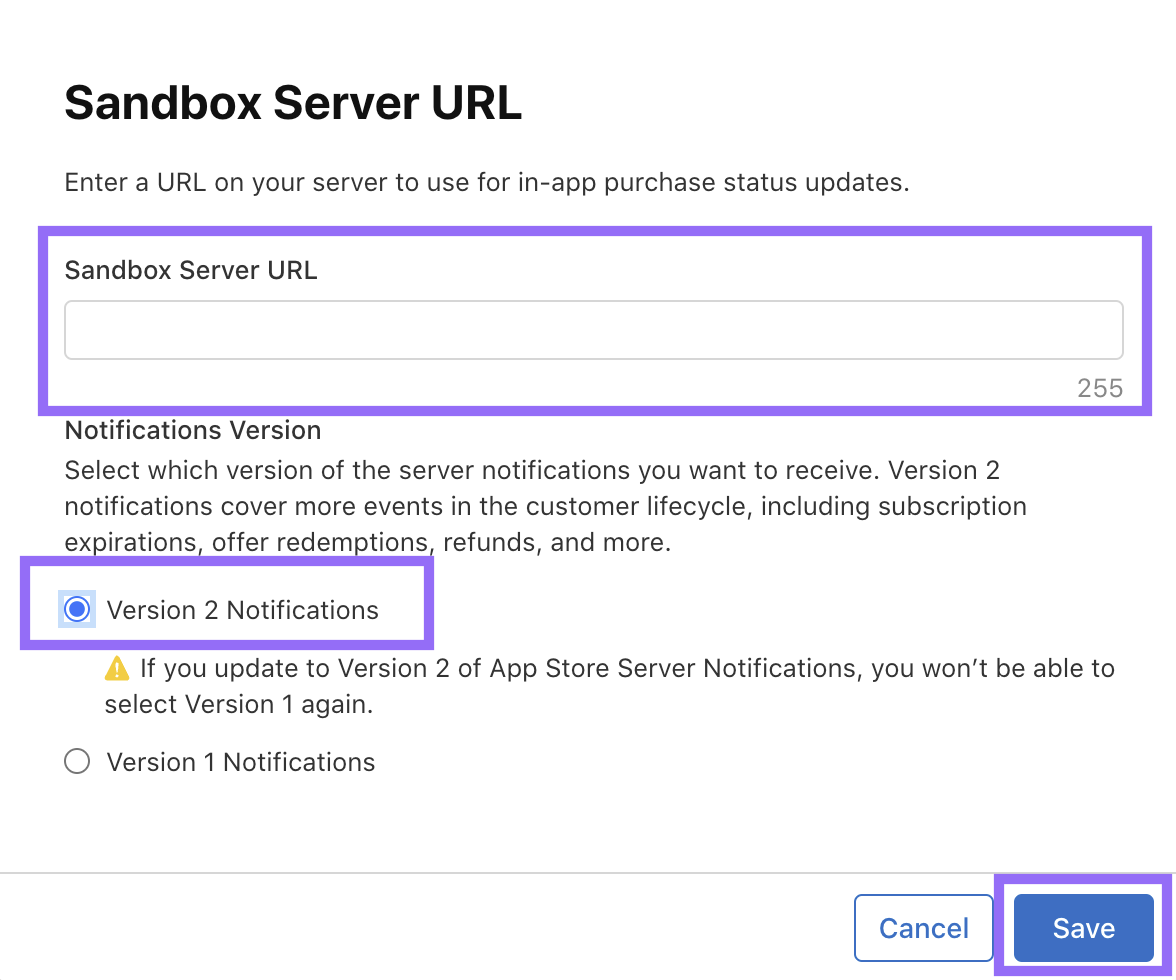
- In App Store Connect, in the App Information section, scroll to App Store Server Notifications, and next to Sandbox Server URL, click Edit.
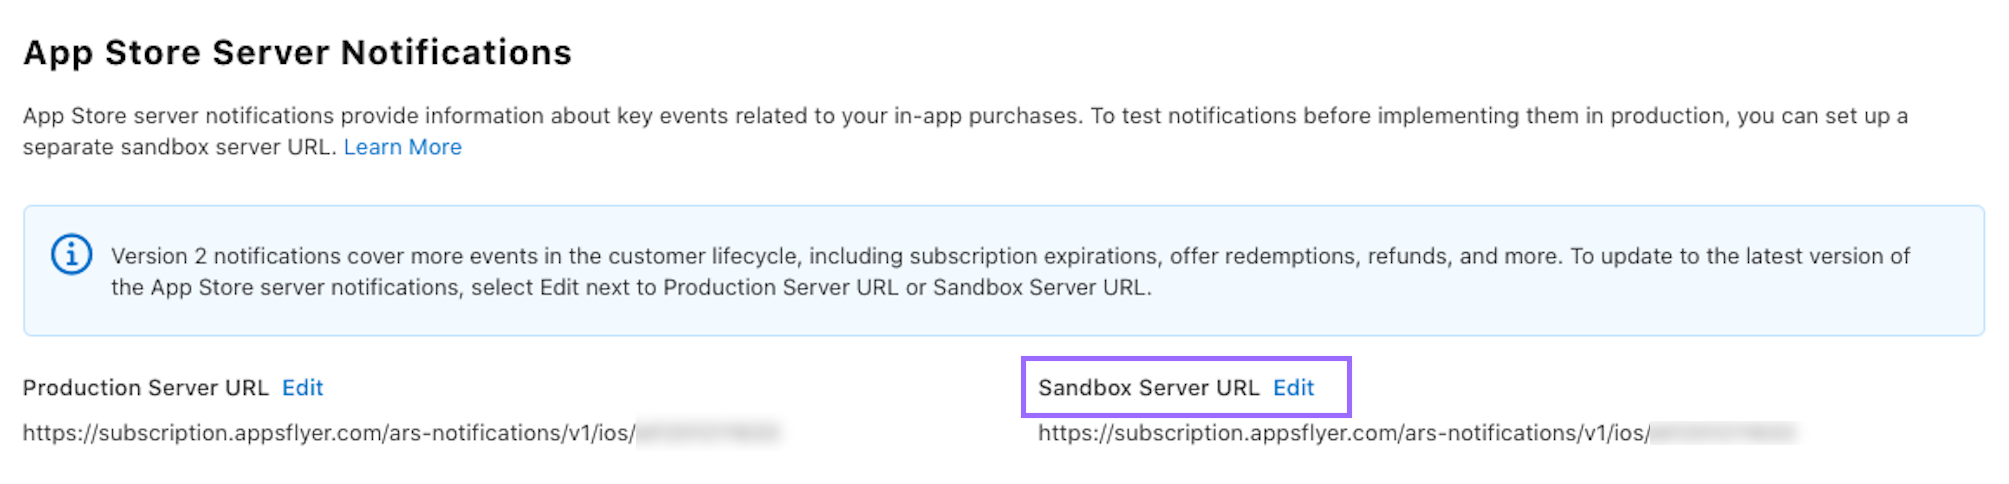
- Paste the URL copied from AppsFlyer, select Version 2 Notifications, and click Save.
Optional. Step 3 Setting up AppodealPurchaseCallback
Once the functionality is enabled and configured, when a purchase is made in your app, Appodeal SDK will automatically detect, verify and send the inApps/subscription details to Appodeal Dashboard. If you want to receive purchase information in your app, you need to perform the following steps:
- Set the purchase delegate. We recommend doing it in the AppDelegate
-didFinishLaunchingWithOptions:function:
- Swift
- Objective-C
@UIApplicationMain
final class MyAppDelegate: UIResponder, UIApplicationDelegate, AppodealInitializationDelegate {
    func application(
        _ application: UIApplication, didFinishLaunchingWithOptions
        launchOptions: [UIApplication.LaunchOptionsKey : Any]? = nil
    ) -> Bool {
        Appodeal.setLogLevel(.verbose)

        // New optional delegate for initialization completion
        Appodeal.setInitializationDelegate(self)

        // Optional delegate for for ROI360
        Appodeal.setPurchaseDelegate(self)

        /// Any other pre-initialization
        /// app specific logic

        Appodeal.initialize(
            withApiKey: "APP_KEY",
            types: .interstitial
        )

        return true
    }
}
@interface MyAppDelegate () <AppodealInitializationDelegate>

@end

@implementation MyAppDelegate
- (BOOL)application:(UIApplication *)application didFinishLaunchingWithOptions:(NSDictionary *)launchOptions {
    [Appodeal setLogLevel:APDLogLevelVerbose];

    // Optional delegate for initialization completion
    [Appodeal setInitializationDelegate:self];

    // Optional delegate for for ROI360
    [Appodeal setPurchaseDelegate:self];

    /// Any other pre-initialization
    /// app specific logic

    [Appodeal initializeWithApiKey:@"APP KEY" types:AppodealAdTypeInterstitial];

    return YES;
}

@end
- Implement the following methods of the AppodealPurchaseDelegate protocol:
- Swift
- Objective-C
extension AppDelegate: AppodealPurchaseDelegate {
    func didReceivePurchase(_ successPurchases: [String: Any]?) {
        print("[ROI360] successPurchases: ", successPurchases)
    }

    func didFailPurchase(_ error: (any Error)?) {
        print("[ROI360] failPurchases: ", error?.localizedDescription)
    }
}
@interface AppDelegate () <AppodealPurchaseDelegate>
@end

@implementation AppDelegate

- (void)didReceivePurchase:(NSDictionary<NSString *, id> * _Nullable)successPurchases {
    NSLog(@"[ROI360] successPurchases: %@", successPurchases);
}

- (void)didFailPurchase:(NSError * _Nullable)error {
    NSLog(@"[ROI360] failPurchases: %@", error.localizedDescription);
}

@end
The purchase object contains the following information:
| Parameter | Description |
|---|---|
| product_id | The identifier of the purchased product |
| purchase_date | The date and time when the purchase was made |
| transaction_id | The unique identifier for the transaction assigned by the App Store |
At this point, the connection of automatic purchases is fully completed.
Purchase reports will be automatically uploaded to the Dashboard of your personal cabinet 2 times a day
Manual verification and sending of purchase information
In-App purchase tracking will work only in connection with Adjust/AppsFlyer. To connect them, follow this guide for Adjust and this guide for AppsFlyer.
It's possible to track in-app purchase information and send info to Appodeal servers for analytics. It allows to group users by the fact of purchasing in-apps. This will help you to adjust the ads for such users or simply turn it off, if needed. To make this setting work correctly, please submit the purchase info via the Appodeal SDK.
Step 1. Validate In-app Purchases
To make this work correctly, please submit the purchase information via Appodeal SDK.
Please make sure to use all the parameters from the method below and don't comment out any of them.
- Swift
- Objective-C
Appodeal.validateAndTrack(
    inAppPurchase: "some product id",
    type: .autoRenewableSubscription,
    price: "9.99",
    currency: "USD",
    transactionId: "some transaction id",
    additionalParameters: additionalParameters,
    success: { [weak self] in self?.alert("Purchase is valid", message: $0.description) },
    failure: { [weak self] error, _ in self?.alert("Purchase is invalid", message: error?.localizedDescription) }
)
[Appodeal validateAndTrackInAppPurchase:@"some product id"
                                   type:APDPurchaseTypeConsumable
                                  price:@"9.99"
                               currency:@"USD"
                          transactionId:@"some transaction id"
                   additionalParameters:additionalParameters
                                success:^(NSDictionary *validationResult) {
    NSLog(@"Purchase is valid: %@", validationResult);
                              } failure:^(NSError *error) {
    NSLog(@"Purchase is invalid: %@", error);
}];
Please make sure if you have created in-app product in App Store Connect to use:
- .consumable or .nonConsumable for purchase type,
- .autoRenewableSubscription or .nonRenewingSubscription for subscription.
| Parameter | Description | Usage |
|---|---|---|
| inAppPurchase | some product id | Adjust/AppsFlyer |
| type | Type must be :
| Adjust/AppsFlyer |
| price | In-app event revenue. | Adjust/AppsFlyer/Appodeal |
| currency | In-app event currency. | Adjust/AppsFlyer/Appodeal |
| transactionId | some transaction id | Adjust/AppsFlyer |
| additionalParameters | Additional parameters of the in-app event. |
If you are using your own Adjust account you need to complete Step 2 from our Event Tracking guide and create some required events on Adjust side.
Step 2. Contact Us
After all completed steps contact our support team via email support@appodeal.com or a live chat with the following information :
- Purchases implementation logic in your app (when and where you call validate method and validate purchases).
- Allow us to test purchases in your app and send us the testflight to email support@appodeal.com.
Step 3. Testing
After you have contacted our Support Team and provided all the required information you can test your app to make sure purchases are validated.
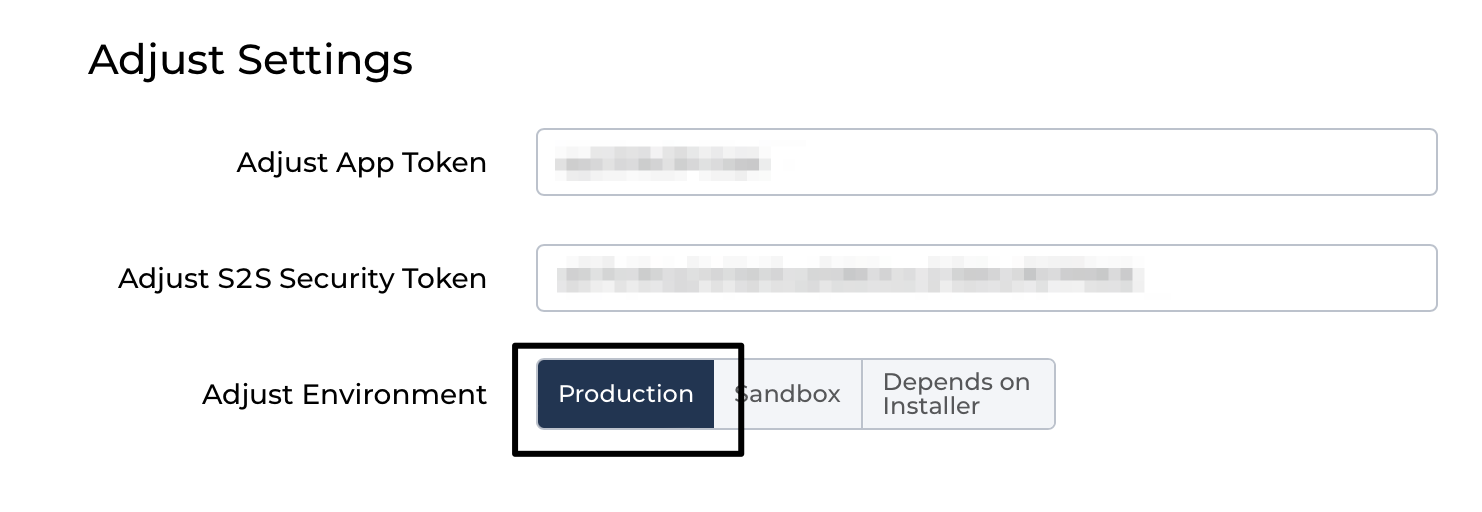
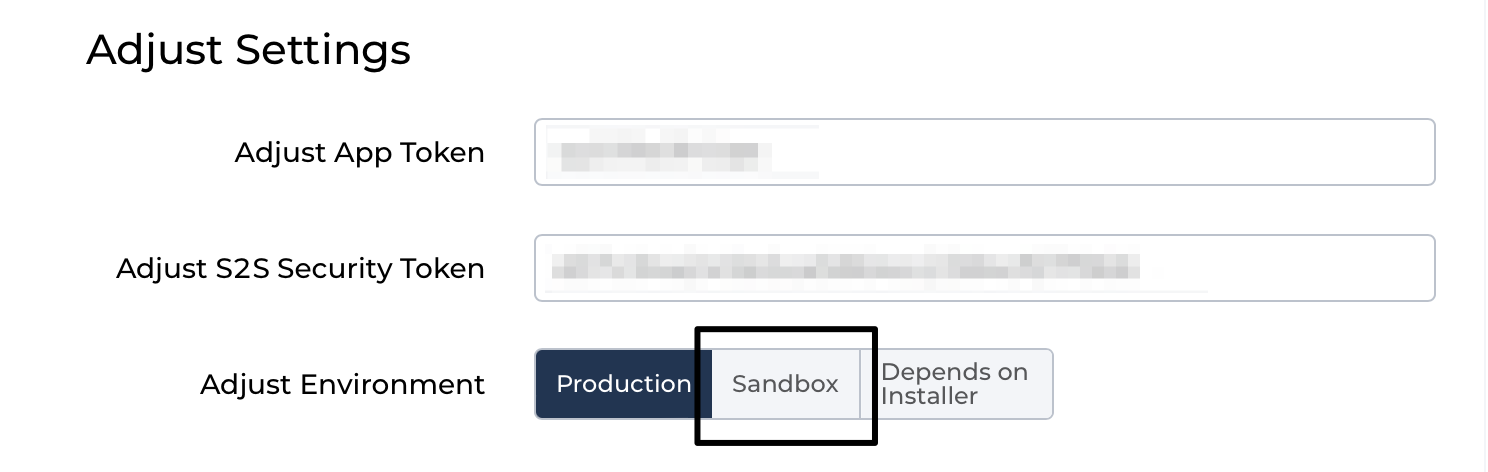
-
Please go to your App Settings → Attribution Settings → and change Adjust Environment from Production to Sandbox to be able to test validation and don't forget to press Save at the end of the page.
-
Connect your device to your computer with the opened console (iOS Console) and tag logs by purchase
-
Now you can open your App and make a test purchase, if you can see Valid purchase in the console, then validation went successfully.
-
If validation has failed, then please recheck all the steps above.
-
After testing, change your Adjust Environment to Production in App Settings → Attribution Settings.